
How-To: Installing PalmSHIELD’s Architectural Screening

PalmSHIELD’s status as the nation’s leading manufacturer of louvered architectural screen fencing and wall derives from many factors. For one, our products are custom-built, tailored to the individual needs of the client. We also present clients with a broad selection of screening styles: traditional louvered screening, LED backlit laser cut metal panels, and mechanical equipment screens with infill designed to resemble masonry. But another key selling point is our user-friendly installation process. Over the decades, we’ve worked closely with installers to hone our process and eliminate system flaw
Table of contents:
- Before installing your architectural screen fencing and wall
- Preparations before installing your architectural screen fencing and wall
- What is the process for PalmSHIELD’s architectural screens?
Before installing your architectural screen fencing and wall
Remember that each installation begins with an original custom fabrication drawing. This drawing serves as the assembly guide for your panels; follow it to the letter; because everything’s specifically fabricated for your individual circumstances, any deviation can result in being unable to complete installation of your product.
Also note that, unless stated otherwise in your fabrication drawings, architectural screen fencing and wall needs to be installed level. Before assembly begins, survey your work area. Verify that the ground/pavement upon which your panels will be set is consistently level. Also ensure that the swing area for your gate is clear of obstacles, including of curbs and fluctuations in the terrain.
Important things to note before installation:
- PalmSHIELD’s panels and posts are predrilled and verified post-fabrication for alignment. Attaching panels to posts is accomplished using a pair of fasteners.
- Your layout drawing numbers all the posts and panels. The panels and posts are likewise numbered for easy association during the installation process.
- When it comes to gate frames, drop rods, internal locking devices, and hinges come pre-mounted. Remaining hinges are packaged for field-welding later. (If certain of site conditions, you have the option of requesting we fully install all hinges.)
Your PalmSHIELD order comes with the following hardware:
- 3/8” x 1¼” stainless steel cap bolt. For installing panels to posts.
- 5/6” x 1” stainless steel metal screw. For attaching panels to posts. Holes for screws are pre-drilled.
- Separately packaged ball bearings. Each hinge will need one ball bearing.
Your PalmSHIELD order does include the following:
- Padlocks and/or locking devices.
- Post anchors. PalmSHIELD’s also not responsible for determining anchor type or installation.
Preparations before installing your architectural screen fencing and wall
- Mark the layout of your architectural screen fencing and wall system according to what’s in the fabrication drawings. This is essential to verifying the completed system will fit the installation area. You can use anything from chalk to tape. Lay out each run (from post outside to post outside) and the gate openings (from post inside to post inside).
- For clients worried about changes in elevation, the best preparation is to identify the highest point that’ll affect your installation and use this as the benchmark elevation for installing all your posts.
- HINT: Start installing your PalmSHIELD system at a permanent structure (a wall, for example). This helps eliminate gaps.
What tools do I need for installing architectural screen fencing and wall?
- Socket set
- Open end wrenches (a full set)
- A minimum of six bar clamps (minimum of six-inch jaws)
- Rubber mallet
- String line
- Marking tape or paint
- Hammer drill bits
- Hammer drill bits for anchor installation (to be determined by contractor)
- Level
- 1½” hammer drill or core bit (for drop rods)
- Screw gun with clutch adjustment
- 1” universal joint (knuckled socket)
- If required for gate installation, a welder
What is the installation process for PalmSHIELD’s architectural screens?
Before we begin, one last piece of advice. For the best results, we recommend installation in the following order: post, panel, post, panel. We do not encourage installing posts first and setting up panels later.
- Use the post baseplate template provided with your order to align the first post—line according to your site markings. Verify that the post baseplate runs parallel to the run; do not allow twisting. Mark the anchor holes centers.
- Set the anchors for your posts.
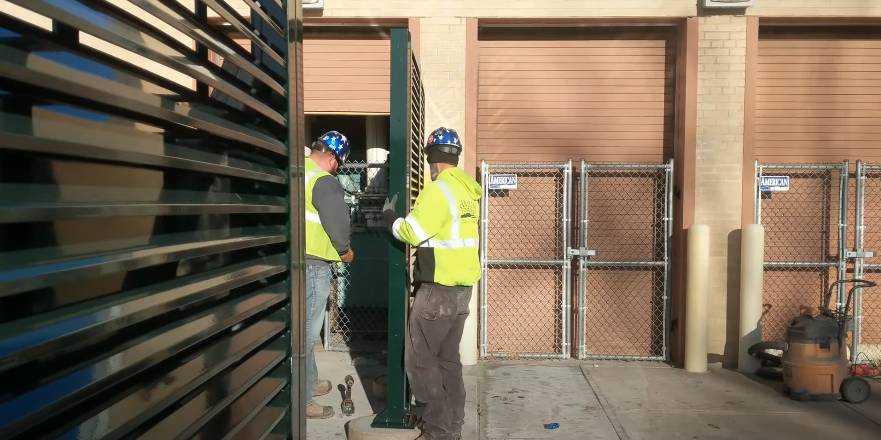
- Go to the first post marked on your drawing. Each post will be labeled accordingly. Verify if it’s a corner post, end post, or gate post (which will also be marked on your plans). The post type can be identified according to the holes—for attachment of panels and gates—drilled into the post.
- In setting your first post, verify that it’s plumb in every direction.
- Reference your drawings to identify the first panel. (Panels are likewise numbered, in this case on the bottom of each one.)
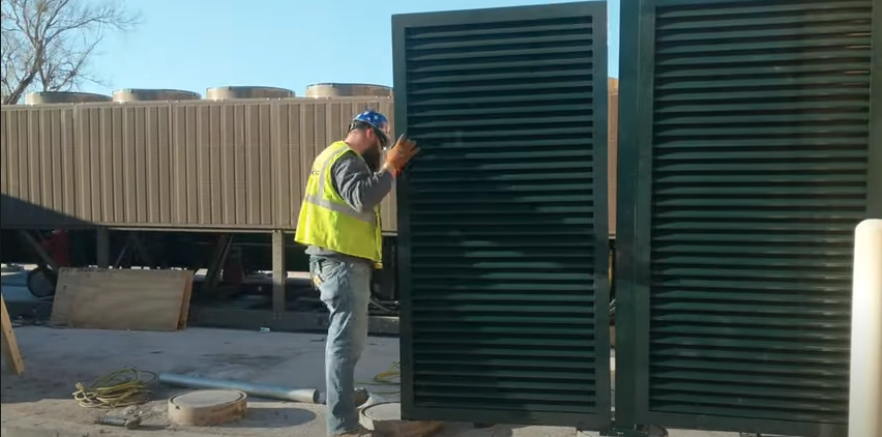
- Align the first panel to the first post, all the while verifying that the louvers face the correct direction. (Also, make sure the panel isn’t upside down. Believe us, it happens!) Sometimes louvers are installed to restrict visibility from a downward position, so always check your drawings to make sure the louvers are pointing the right way.
- In aligning the panel top its post, verify they are flush and then attach the two parts using bar clamps.
- Using wood blocking, shim under the panel to maintain alignment and keep everything level. If necessary, you can use a universal joint to install the stainless steel machine screws or bolts. Do not overtighten the screws, as aluminum is comparatively speaking a pretty soft metal, meaning the screws are easily self-threaded. Overtightening simply strips the aluminum. To avoid stripping, we recommend using a screw gun with an adjustable clutch.
- Now that the first panel has been attached, go to the second post marked on your fabrication drawings. Repeat the above process.
- When you get to your gate opening, install the posts exactly as shown in your drawings. Do note that gate installations vary depending on the installation site. Consider that the gate needs to swing relative to the grade beneath it, with plenty of clearance.
- With gate elevation determined, start welding the remaining half of the gate to the post. Align the hinge so that a 3/8” gap exists between the back of the barrel and the post.
- Shut your gate to the appropriate location and lower the drop rod. Mark the socket location. If necessary, repeat this step for the open position. We also recommend a 1½” hammer drill or core bit for the drop rod sockets. If necessary, trim the drop rods.
No further installation should be required for your gate’s internal locking device; keys are located in the hardware package accompanying your order. Your order also includes touch-up paint, so check for chips and scratches.
To paint over scratches:
- Hold the paint can 6-8” away from the surface.
- Sweep across until the scratch is covered.
Just reading up on PalmSHIELD’s installation progress before making that initial phase of contact? Like what you see? Contact our sales staff today for an estimate on your architectural screen fencing and wall!